> ## Documentation Index
> Fetch the complete documentation index at: https://docs.junojourney.com/llms.txt
> Use this file to discover all available pages before exploring further.
# Access tokens
> Create an MCP access token so CI jobs and scripts can connect to Juno without a browser sign-in.
export const RelatedPages = ({pages = []}) => {
if (pages.length === 0) return null;
return <>
Related articles
{pages.map(page => )}
;
};
export const SupportContact = () => {
return
Contact us at support@junojourney.com or open Support from your profile menu in Juno.
;
};
export const RoleBadge = ({roles = []}) => {
const colorMap = {
Admin: "yellow",
Manager: "blue",
Learner: "green",
"Co-editor": "purple"
};
return <>
{roles.map(role => {role}{" "})}
;
};
export const Prerequisites = ({items = []}) => {
return
{items.length > 0 &&
{items.map((item, index) => - {item}
)}
}
;
};
Assistants usually connect to Juno through a browser sign-in. CI pipelines, scheduled jobs, and scripts can't open a browser — give them an MCP access token instead.
## How access tokens work
* **MCP only** — the token works with the Juno MCP server and nothing else. The Juno REST API rejects it; to call the API, see [API Overview](/integrations/api-overview).
* **Acts as you** — everything done with the token is done as the Admin who created it, with that Admin's Juno permissions.
* **Valid for 365 days** — after that, create a new token.
* **Revocable** — revoke a token at any time and it stops working immediately.
* **Tied to its creator** — if the Admin who created it is deactivated, the token stops working.
## Create a token
Go to **Admin → Security → Developer Settings** and select **Generate Personal Access Token**.
Select **Connect AI assistants (MCP)** on its own. An MCP access token can't carry any of the other permissions in the list.
Enter a **Token name** of up to 80 characters that says where the token is used — for example, `GitHub Actions: weekly content report`. The name is how you'll find the token when it's time to revoke it.
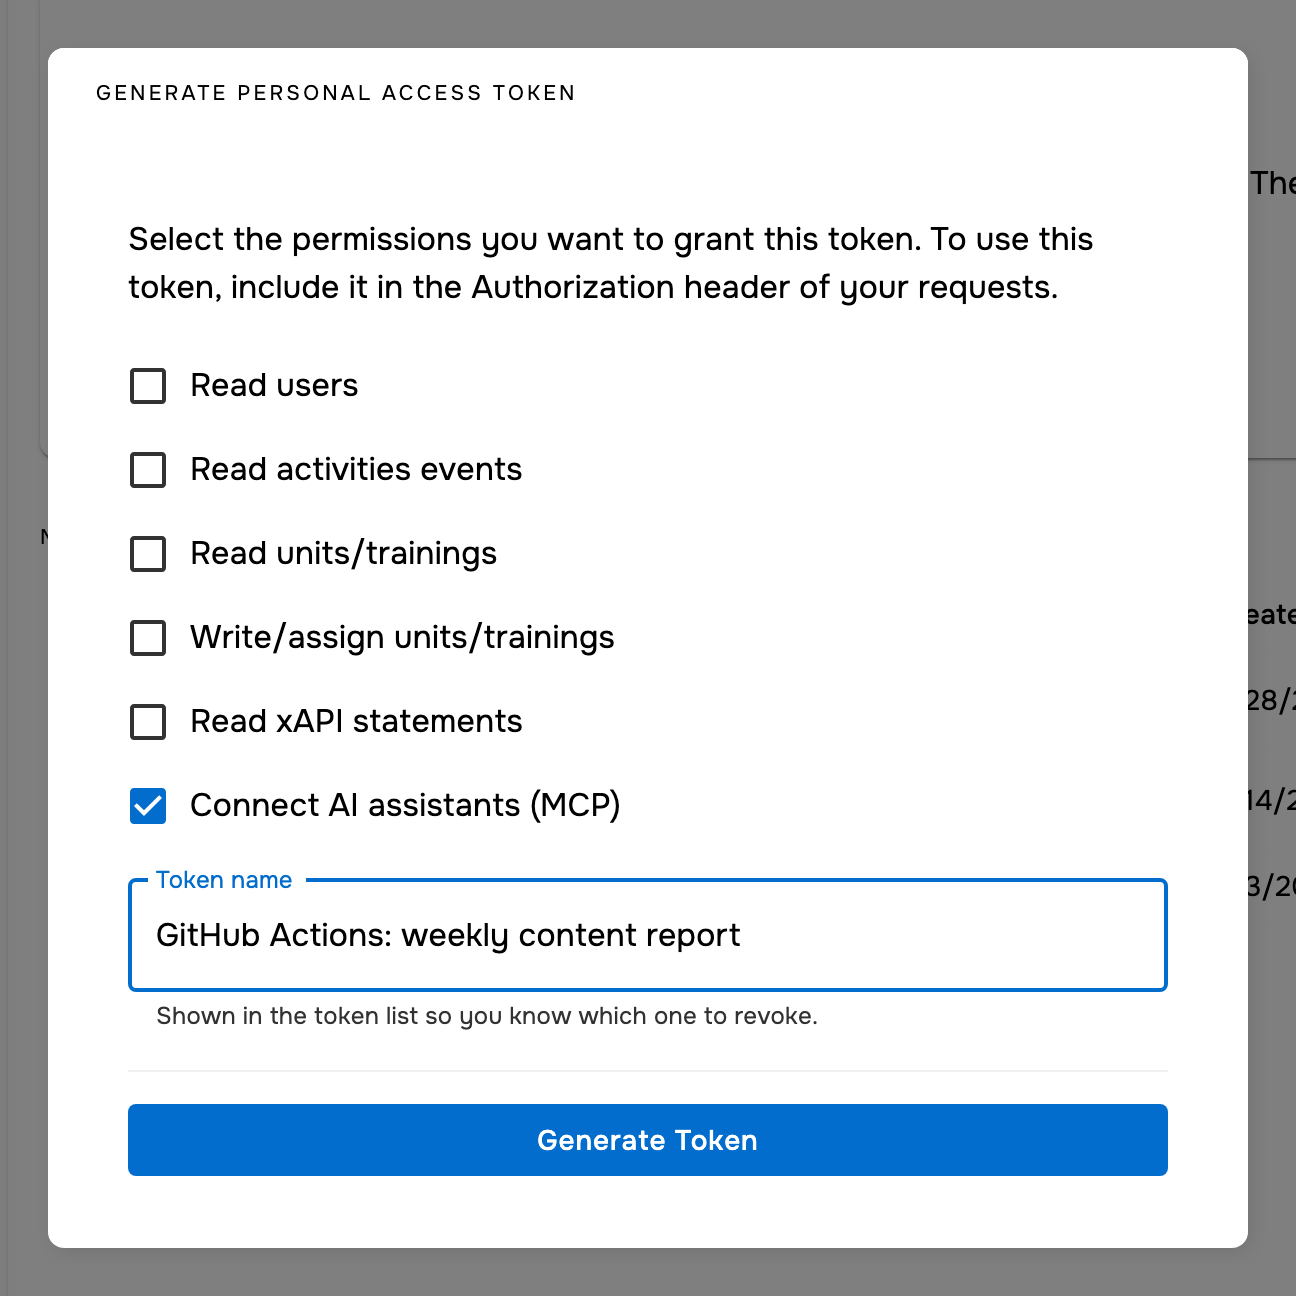 Select **Generate Token**, copy the token, and store it somewhere secure right away. Juno shows it only once — if you lose it, revoke it and create a new one.
## Connect with a token
Point your client at the server URL without `?workspace=` — the token already identifies your workspace:
```
https://mcp-prod.the-juno.com/mcp
```
Send the token in the `Authorization` header of every request:
```
Authorization: Bearer
```
For example, this project `.mcp.json` for Claude Code reads the token from the `JUNO_MCP_TOKEN` environment variable, so the token itself never goes in the file:
```json theme={null}
{
"mcpServers": {
"juno-journey": {
"type": "http",
"url": "https://mcp-prod.the-juno.com/mcp",
"headers": {
"Authorization": "Bearer ${JUNO_MCP_TOKEN}"
}
}
}
}
```
Other clients have their own setting for custom headers — check your client's documentation.
## Use a token in CI
Store the token as a secret in your CI system and pass it to the job as an environment variable. In GitHub Actions:
In your GitHub repository, go to **Settings → Secrets and variables → Actions**, select **New repository secret**, name it `JUNO_MCP_TOKEN`, and paste the token.
Map the secret to an environment variable on the step that runs your MCP client:
```yaml theme={null}
- name: Run the Juno job
env:
JUNO_MCP_TOKEN: ${{ secrets.JUNO_MCP_TOKEN }}
run: ./scripts/run-juno-job.sh
```
Replace the `run` command with however your job starts its MCP client. A client set up like the `.mcp.json` example above picks the token up from the environment, and GitHub masks the secret in job logs.
## Keep tokens safe
* Treat a token like a password. Keep it in a secret store — never in code, in a file you commit, or in a URL.
* Create one token per job or system, named after it, so you can revoke one without breaking the others.
* Don't share a token between people or add it to a shared assistant connector. Everyone using it would act as you, with your Admin permissions.
* Replace tokens before they expire: create a new token, update the secret, then revoke the old one.
## Revoke a token
Revoke a token as soon as it's no longer needed, or right away if it may have been exposed.
Go to **Admin → Security → Developer Settings**. The **MCP tokens** list shows every MCP access token in your organization, with its name, who created it, when it was created, and when it expires.
Select **Generate Token**, copy the token, and store it somewhere secure right away. Juno shows it only once — if you lose it, revoke it and create a new one.
## Connect with a token
Point your client at the server URL without `?workspace=` — the token already identifies your workspace:
```
https://mcp-prod.the-juno.com/mcp
```
Send the token in the `Authorization` header of every request:
```
Authorization: Bearer
```
For example, this project `.mcp.json` for Claude Code reads the token from the `JUNO_MCP_TOKEN` environment variable, so the token itself never goes in the file:
```json theme={null}
{
"mcpServers": {
"juno-journey": {
"type": "http",
"url": "https://mcp-prod.the-juno.com/mcp",
"headers": {
"Authorization": "Bearer ${JUNO_MCP_TOKEN}"
}
}
}
}
```
Other clients have their own setting for custom headers — check your client's documentation.
## Use a token in CI
Store the token as a secret in your CI system and pass it to the job as an environment variable. In GitHub Actions:
In your GitHub repository, go to **Settings → Secrets and variables → Actions**, select **New repository secret**, name it `JUNO_MCP_TOKEN`, and paste the token.
Map the secret to an environment variable on the step that runs your MCP client:
```yaml theme={null}
- name: Run the Juno job
env:
JUNO_MCP_TOKEN: ${{ secrets.JUNO_MCP_TOKEN }}
run: ./scripts/run-juno-job.sh
```
Replace the `run` command with however your job starts its MCP client. A client set up like the `.mcp.json` example above picks the token up from the environment, and GitHub masks the secret in job logs.
## Keep tokens safe
* Treat a token like a password. Keep it in a secret store — never in code, in a file you commit, or in a URL.
* Create one token per job or system, named after it, so you can revoke one without breaking the others.
* Don't share a token between people or add it to a shared assistant connector. Everyone using it would act as you, with your Admin permissions.
* Replace tokens before they expire: create a new token, update the secret, then revoke the old one.
## Revoke a token
Revoke a token as soon as it's no longer needed, or right away if it may have been exposed.
Go to **Admin → Security → Developer Settings**. The **MCP tokens** list shows every MCP access token in your organization, with its name, who created it, when it was created, and when it expires.
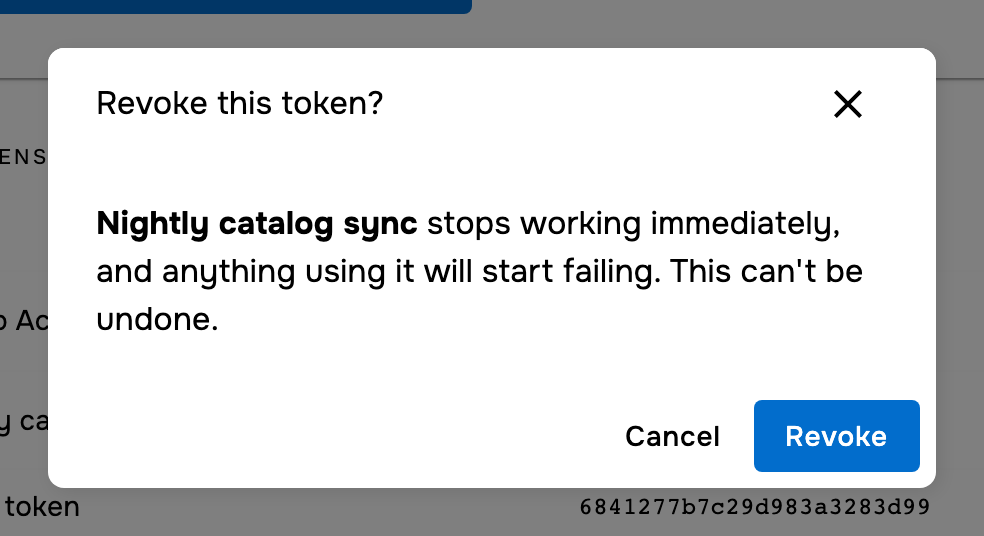
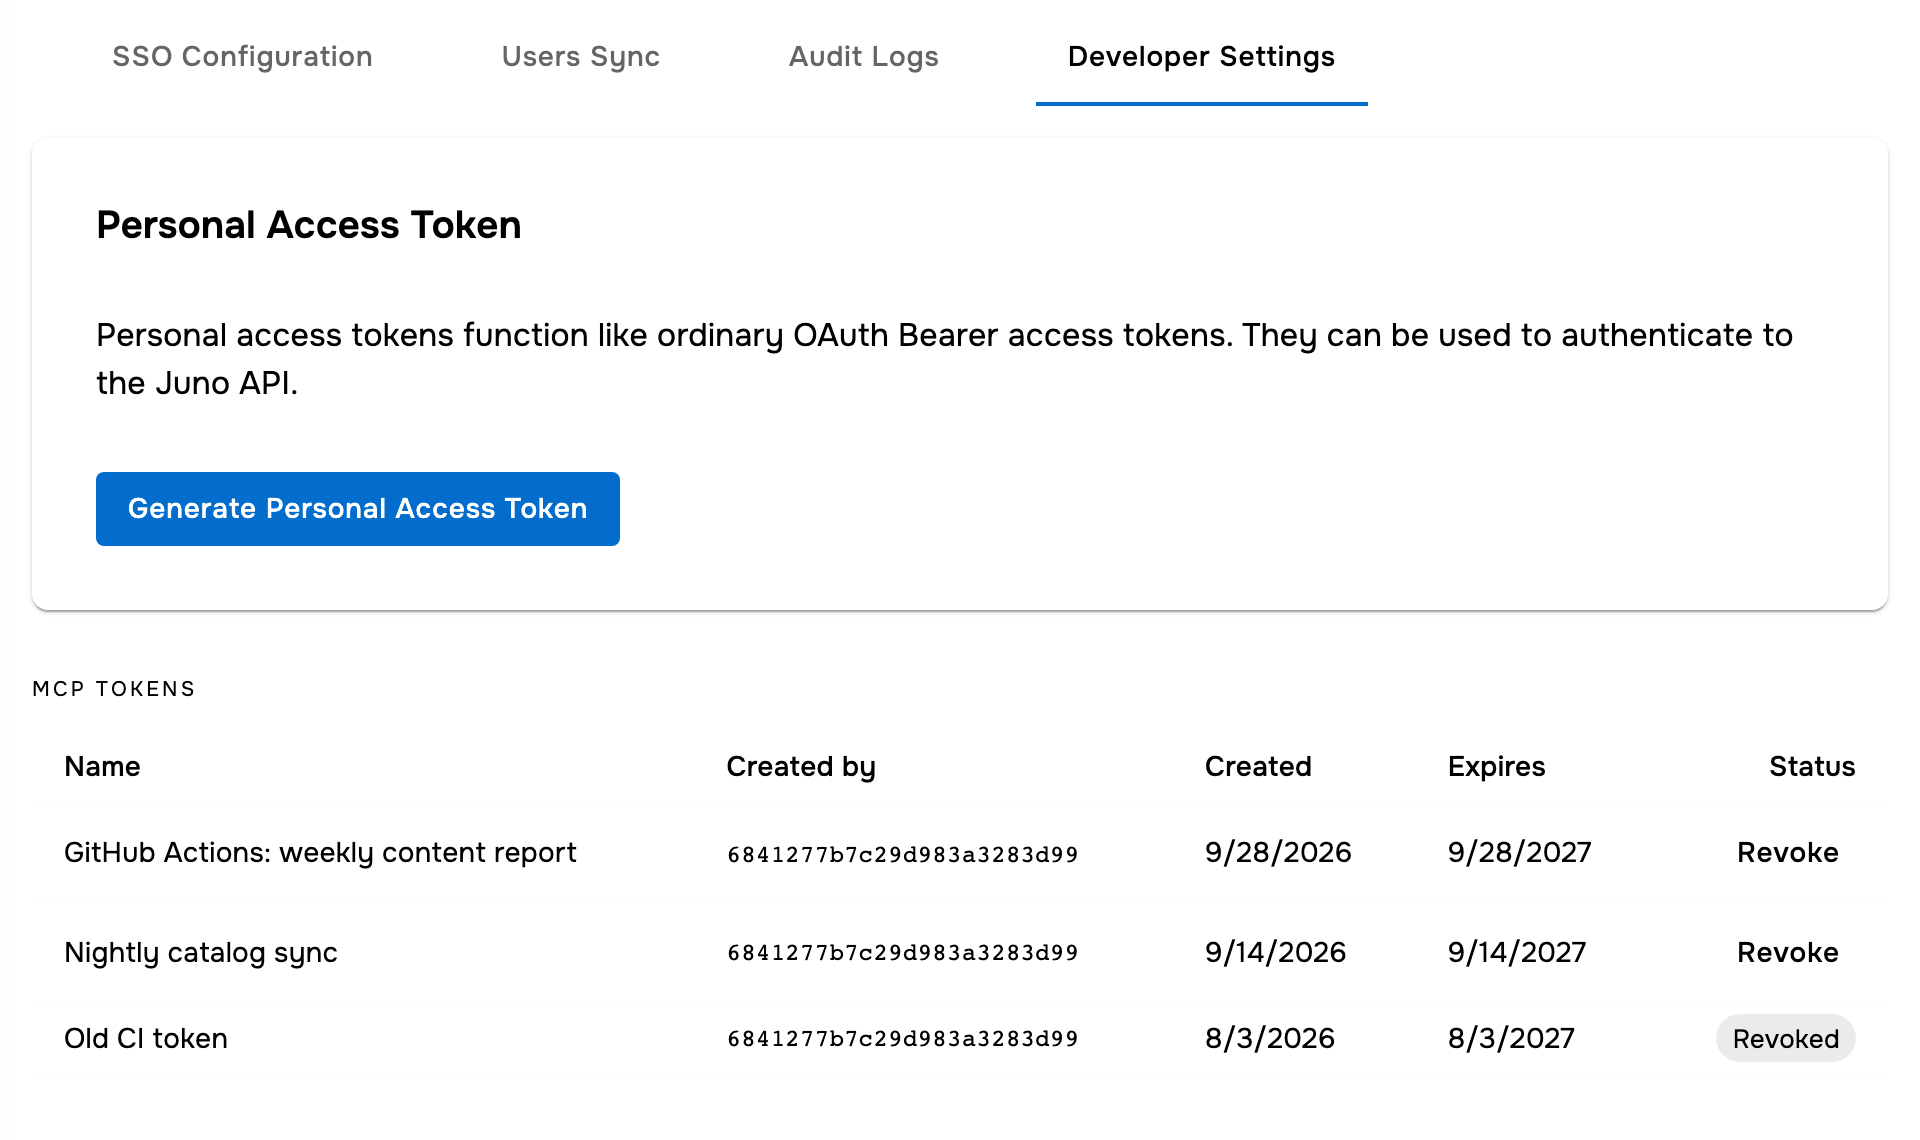 Select **Revoke** on the token's row, then confirm. The token stops working immediately, and anything still using it starts failing. Revoking can't be undone.
 The **MCP tokens** list appears once your organization has at least one MCP access token. Anyone with the Admin and IT Admin roles can revoke any token in the list, not only their own.
## If a token stops working
Juno rejects a token with a `401 Unauthorized` response when:
* It was revoked (the list shows **Revoked**), or it has expired — check its **Expires** date.
* The Admin who created it was deactivated or removed from your organization.
* It was sent to the Juno REST API instead of the MCP server.
* The header isn't exactly `Authorization: Bearer `, or the token was copied incompletely.
In each case, create a new token, update your secret, and revoke the old token if it's still active.
This documentation is built and hosted on [Mintlify](https://mintlify.com), a developer documentation platform.
The **MCP tokens** list appears once your organization has at least one MCP access token. Anyone with the Admin and IT Admin roles can revoke any token in the list, not only their own.
## If a token stops working
Juno rejects a token with a `401 Unauthorized` response when:
* It was revoked (the list shows **Revoked**), or it has expired — check its **Expires** date.
* The Admin who created it was deactivated or removed from your organization.
* It was sent to the Juno REST API instead of the MCP server.
* The header isn't exactly `Authorization: Bearer `, or the token was copied incompletely.
In each case, create a new token, update your secret, and revoke the old token if it's still active.
This documentation is built and hosted on [Mintlify](https://mintlify.com), a developer documentation platform.