

Overview
Admin → Settings (/admin/4) is the platform configuration hub. Managers have limited access; most sections require Admin role.
Sub-tabs
Profiles
The separate Profiles tab has been retired. You now define positions, and link competencies to them, in Admin → Career Growth. See Career Growth Administration.Skills management
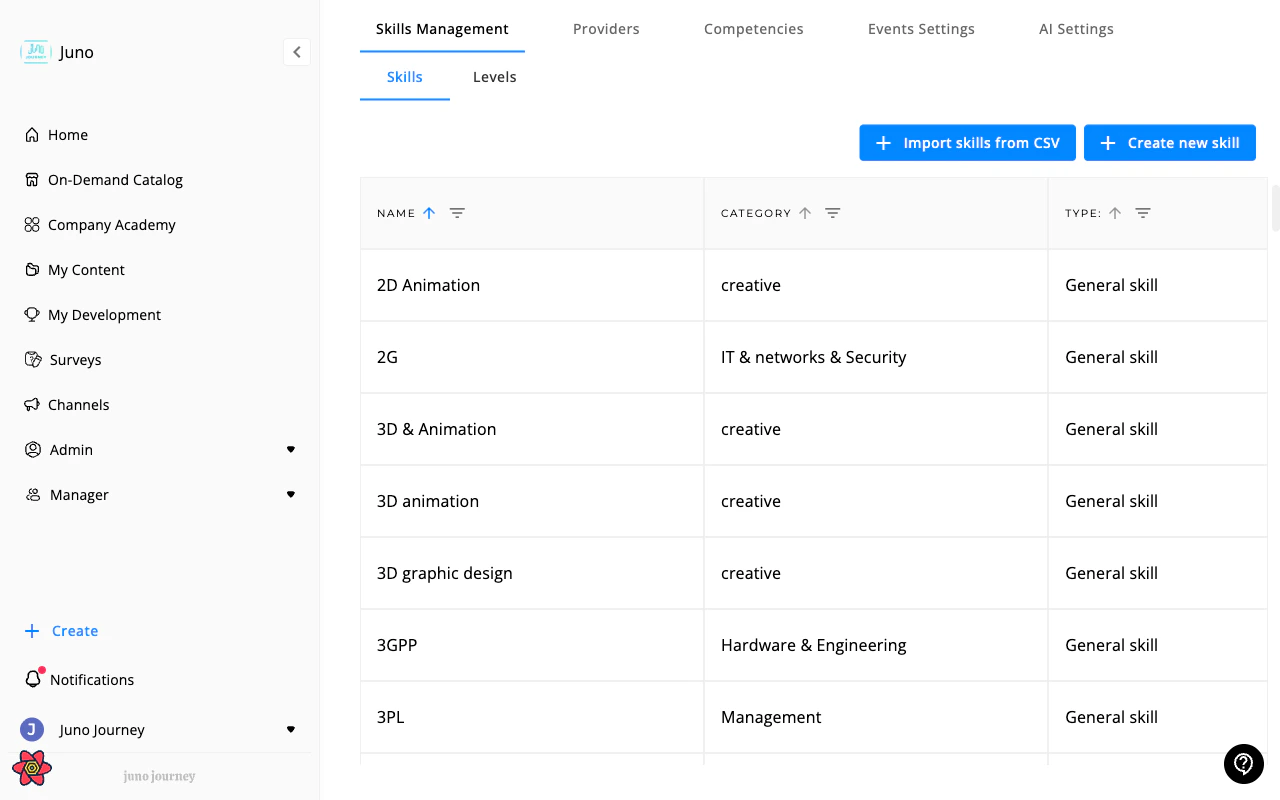
Define your organization’s skills taxonomy in Admin → Settings → Skills Management. The page has two tabs: Skills and Levels. The Skills tab lists every skill in a table.
The table is sorted by name. Select a row to edit that skill, or select Create new skill to add one.
Skills link to positions and competencies. See Career Growth Administration.
Skills Management isn’t shown for organizations that only use the LXP module, or for customer-training workspaces. Some organizations still see two separate tabs, Company Skills and Company Levels, instead of one Skills Management page. Contact your Juno team if you’d like the new page.
Providers
Manage external content provider integrations:- Connect providers (Udemy, Coursera, LinkedIn, Pluralsight, etc.)
- Configure API credentials
- Manage custom websites (if enabled)
Company levels
Levels describe how proficient someone is in a skill. Define them on the Levels tab of Skills Management, from the lowest level to the highest.- Pick a category from the dropdown. Default is the scale Juno falls back to when a category doesn’t have levels of its own.
- Select Edit category levels. For a category with no custom levels yet, select Create category labels instead.
- In the labels dialog for that category, fill in the rows you need. There are nine rows, numbered 1 to 9, where a higher number means a higher level. Each row has a Name, a Description, and an Active switch. The switch is available once the row has a name.
- Select Save. At least two rows must be named and active.
Competencies
Build your competency framework in Admin → Settings → Competencies. Select Options to:- Create Competency — opens the competency page.
- Manage Categories — create and edit competency categories. Each category shows how many competencies and positions use it.
- Import From CSV — map the columns of a file to competency fields and import many competencies at once. Competency Name is required.
Notification Settings
Control which notifications your organization sends and through which channels:- Enable or disable email, push, and Slack/Teams delivery per notification
- Customize notification message text per language and channel
- Set the email logo and disable all notifications organization-wide
Available to Owners by default.
Events settings
Configure event-related platform settings:- Default event settings
- Calendar integration options
- Session registration policies
AI settings
Configure the Juno assistant and AI features:- External app integrations (Google Calendar, Drive, JIRA)
- AI model settings
- Supervisor agent configuration
Requires the Admin role and AI features to be enabled.
Text & labels
Rename the text people see throughout Juno in Admin → Settings → Text & Labels. Every label shows Juno’s default text and one box per language: English, French, and any other languages enabled for your organization.
To change a label:
- Type your text in the box for a language, then click outside the box. Juno saves it.
- Leave a language empty, or type the default text, to go back to the default in that language.
- Select the translate icon (AI Translate to all languages) to fill the other languages from your English text. Review the translations, then click out of each box to save it. The icon is available once the English box has custom text.
- Select the reset icon (Reset all languages to default) to clear the customization for every language.
Edit labels in place
You can also rename sidebar and tab labels where they appear. Open your account menu in the sidebar and select Edit Labels. A pencil appears next to each label you can change. Type the new text, press Enter to save or Escape to cancel, and select Done Editing when you finish.Owners can open Text & Labels and Edit Labels by default. Contact your CSM if Admins need them too.
Hide sidebar items
Choose which sidebar items learners and managers see (Admin → Settings → Navigation):- Switch items off one by one — catalog, Company Academy, My Content, My Development, Events, Surveys, Reviews, Channels, the Create button, the Groups, Manager and Evolution sections, and the Event Integrations and Submit Custom Request account options
- Select Save to apply the whole list; Discard and Show all only change your draft
- Rename items in Text & labels — this tab only shows or hides them
- Admins always see every item, so your own sidebar doesn’t change. To check a learner’s view, use Impersonate on a learner (when allowed) or ask Juno support.
- Hiding is not blocking. The page still opens from links, search, home cards and notifications. To turn a feature off, ask Juno support.
- Home, Admin, Notifications, My Profile and the account essentials are always shown. A catalog that is someone’s home page stays in their sidebar.
- Learners and managers see the change the next time they open Juno.
Juno support enables this per organization. Requires the Admin role.