What is a course?
A Course (aka ‘learning’ unit type) is Juno’s main content type for structured learning. Courses contain sections — each section holds content like text, images, videos, embedded resources, and questions.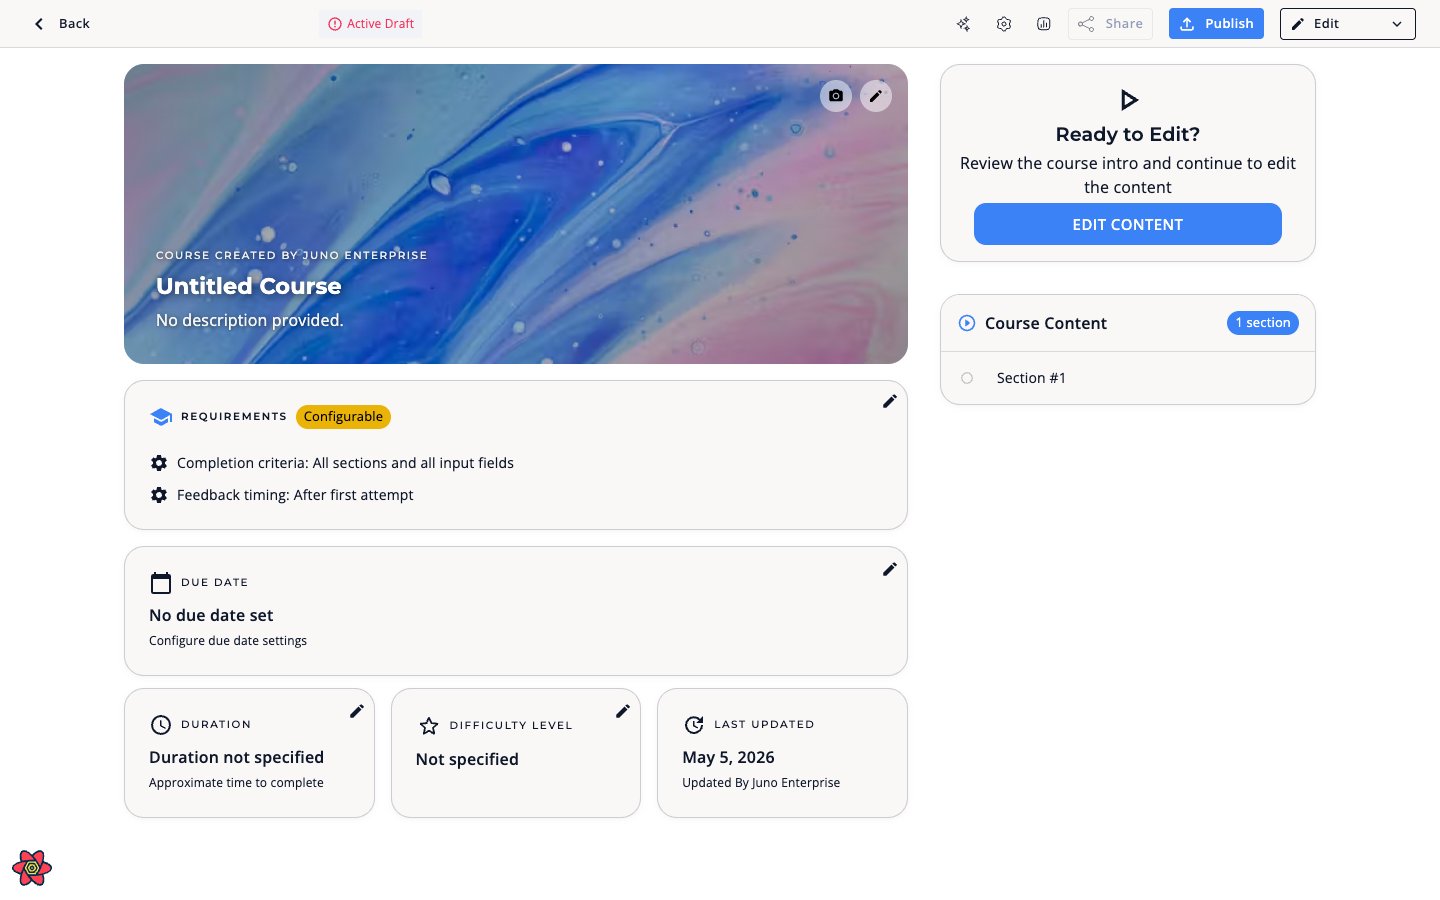
Course structure
A Course is made up of sections. Each section can contain:- Rich text content
- Embedded videos and images
- Questions (multiple choice, open text, true/false)
- File uploads and interactive elements
Creating a course
1
Open the creation menu
Click + Create in the sidebar, hover New, and choose Course.
2
Set Course details
Add a title, description, thumbnail image, and language.
3
Build sections
Add sections with content, questions, and media. Drag to reorder.
4
Configure settings
Open the settings panel to configure completion criteria, due dates, and permissions (see below).
5
Publish
Review and publish. The course appears in the Company Academy for learners.
Course settings
The settings panel has 3 tabs for courses: General, Course Behavior, and Permission & Control.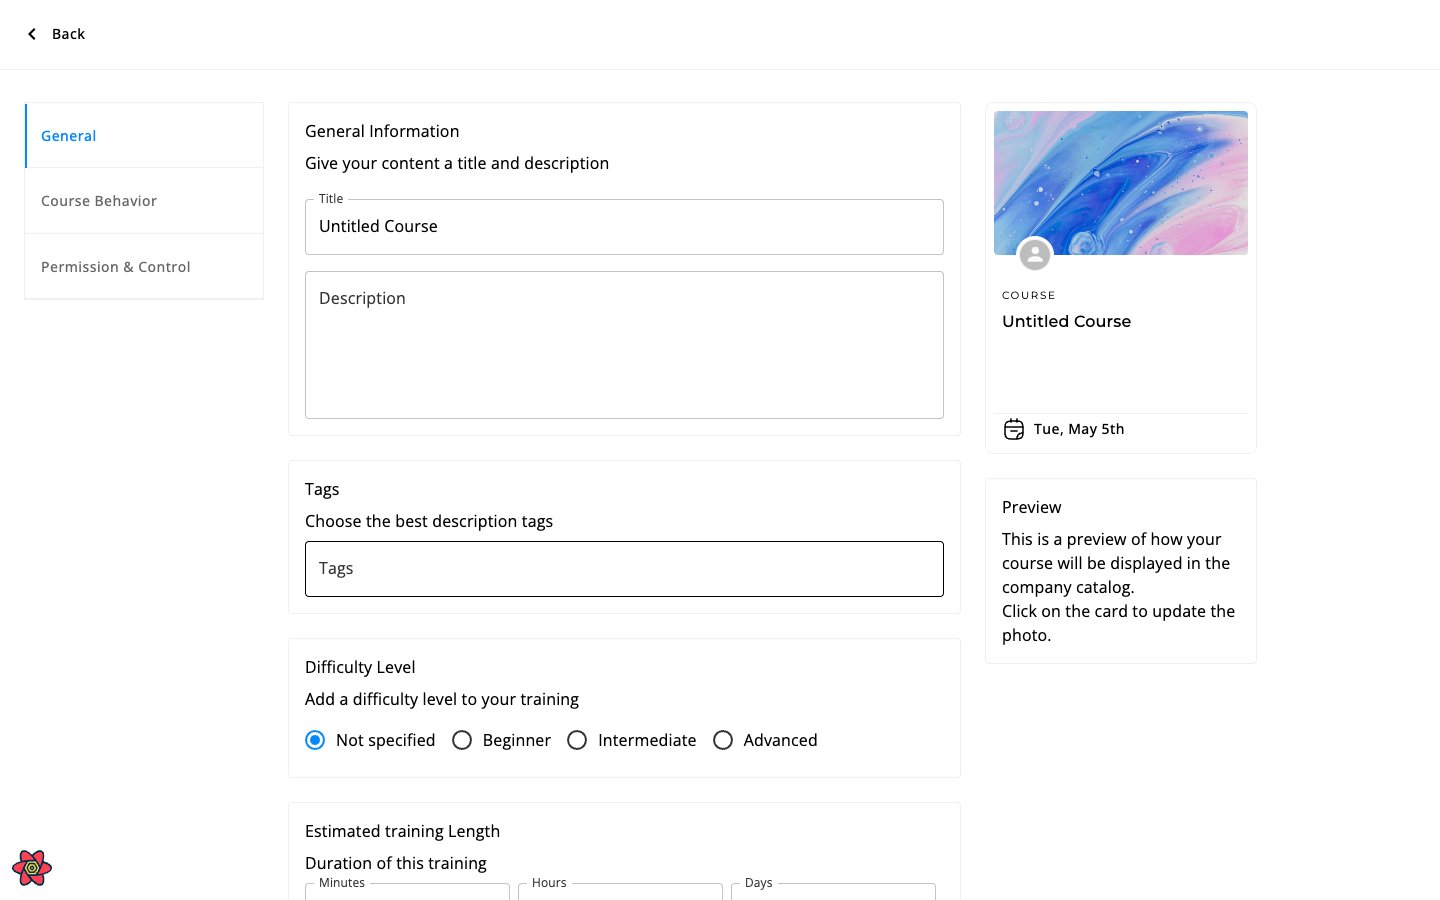
General tab
Course Actions (bottom of the General tab):
Course Behavior tab
Completion criteria — Controls when a course is marked as completed:
Feedback for closed questions — Controls when correct answers are revealed:
Due dates (if enabled for your organization):
- None — no deadline
- Specific date — a fixed calendar date
- Relative date — calculated from assignment date (e.g., “14 days after assignment”)
- Early Warning (7 days before)
- Late Warning (1 day before)
- Reminder (2 days after) (for learners who are overdue)
Due-date reminders and other unit automations aren’t sent to the unit’s creator or co-editors, even if they’re also assigned to it.
Permission & Control tab
Embed a course on your website
Embed on External Site gives you a snippet of code that shows a course’s public page inside another website, such as your intranet or help center. You need edit access to the course. The card appears for courses only. This may not be enabled for your organization: it also needs your public catalog to be turned on.1
Publish the course
Visitors see the public, published version, so publish the course to your academy catalog first.
2
Open the card
In the course’s settings, open the Permission & Control tab and find Embed on External Site. It shows the snippet in a read-only box.
3
Copy the code
Select Copy code. Juno confirms with Embed code copied. If your browser blocks copying, Juno says Failed to copy embed code. Select the text in the box and copy it yourself.
4
Paste it into your page
Paste the snippet into the HTML of the page where the course should appear.
Some settings are only visible if your admin has enabled specific features for your organization.
Certificates
Certificates are set up on a Journey, not on a single course. A course’s settings have no certificate option. To award a certificate when learners finish a course, put the course in a Journey and attach a certificate to the Journey from Manage Certificates in the Journey editor. You choose a template, then fill in the certificate, including its expiration. See Choose a certificate template. Where Accredible is enabled, an automation on the course can also issue an Accredible certificate when learners complete it. For learners downloading a certificate, see Certifications.Cover image
The cover image appears on the course intro page and in the catalog. To set or update it, open the course intro and select Change photo.Blur the cover image
You can apply a soft blur to the cover image without replacing it — useful when the photo is busy, low resolution, or you want the title and description to stand out.1
Open the course intro
Navigate to the course you want to edit.
2
Toggle blur
On the cover image, select the blur icon next to Change photo. The icon highlights when blur is on.
Blur only affects how the image is displayed. The original photo is preserved, so you can turn the blur off at any time.
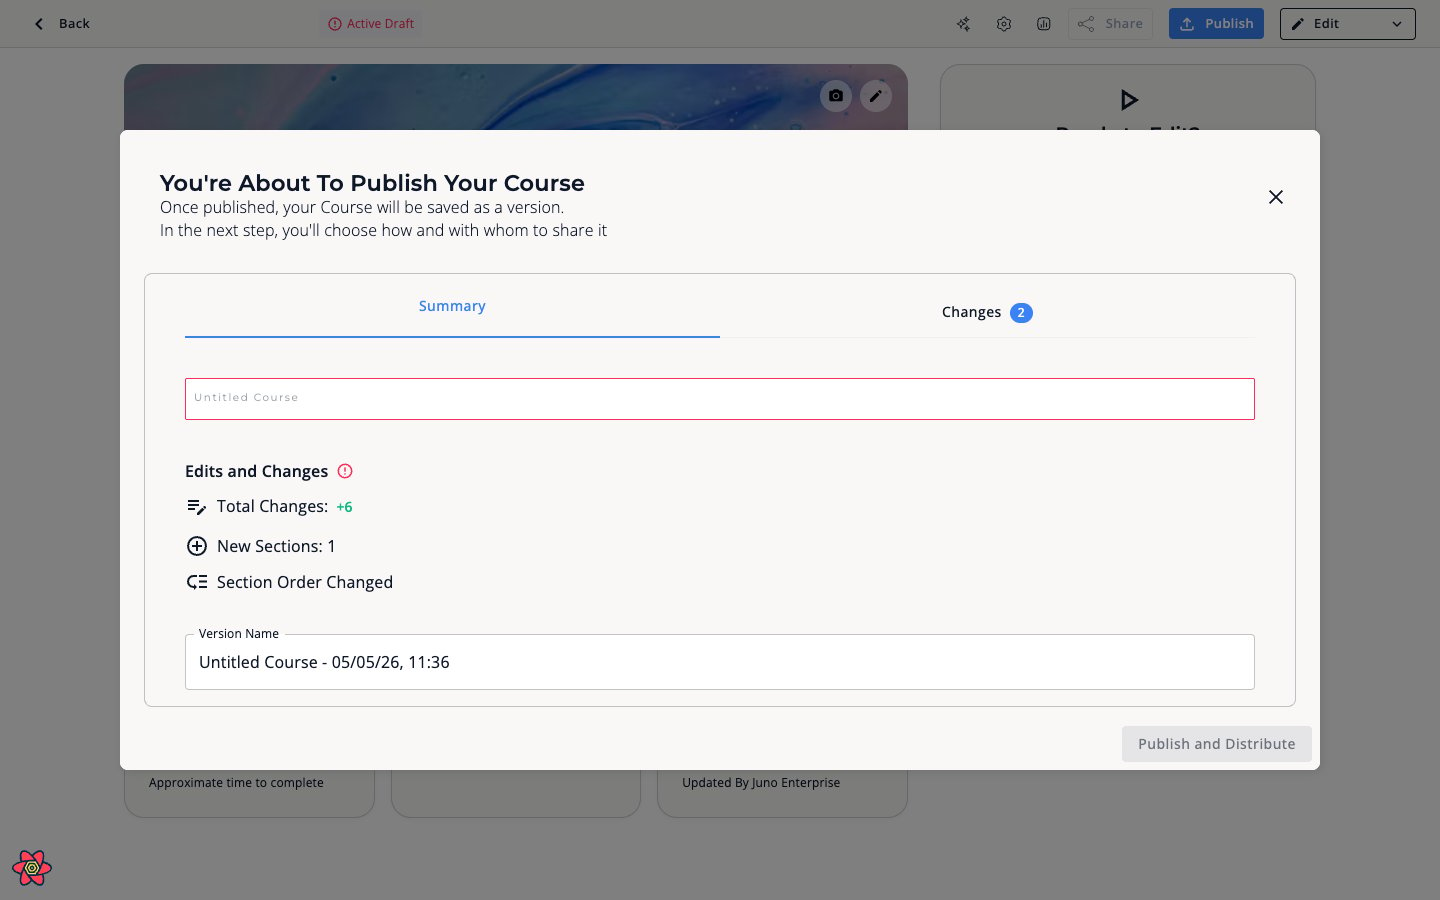
Publishing & versioning
Courses have a draft and published version:- Edit the draft without affecting what learners see
- Publish to push changes live
- Version number increments on each publish